Exporting Planning Data
You can use this export function to obtain the current planning status, such as financial planning (planned versus actual status) or scheduling (activities within a period). This feature works for a complete year or a specific part of a year. The export reflects all your current settings for the budget view, including year selection, activity filtering, and budget column configuration. Exports of the entire tree structure now run in parallel.
Starting an Export
-
Select whether you want to export the scheduling or the financial planning:
-
Scheduling: Click > > Calendar.
-
Financial planning: Click > > Budget.
-
-
Note: You can export the marketing plan as both PDF and Excel from Calendar view, and only in Excel format from Budget view.
-
Select the year whose data you want to export.
-
If needed, filter the planning activities to include only specific data.
-
For financial planning exports:
-
Specify whether to export monthly or quarterly data
-
Select the budget view to export
-
-
Click the export button
 in the toolbar.
 -
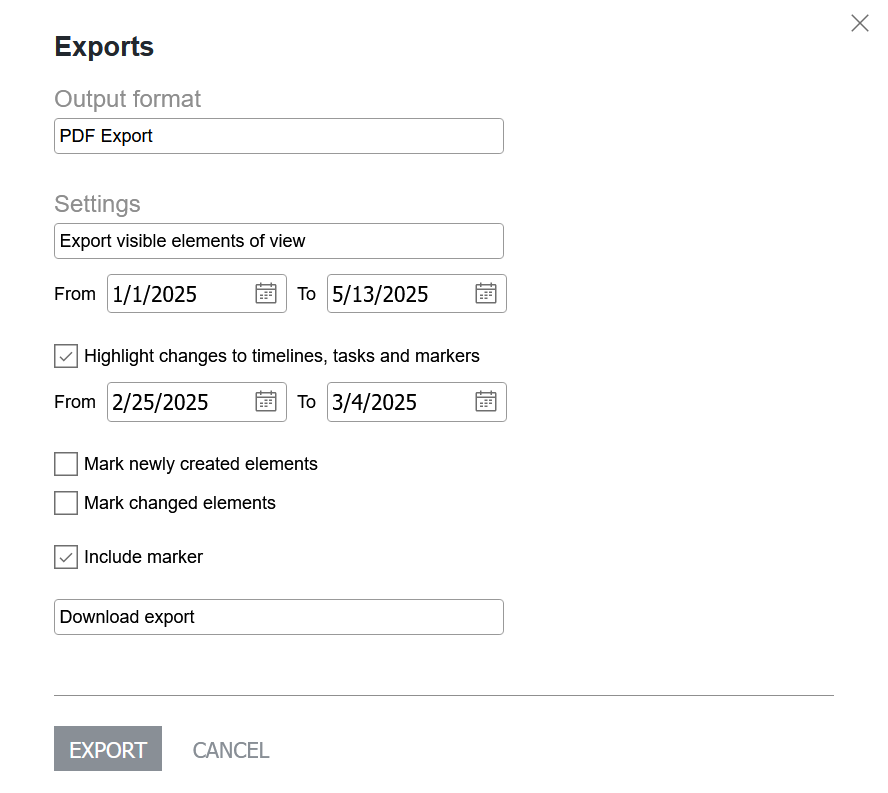
The Exports dialog box opens.
-
From the dropdown list in the Output format area, select:
-
PDF Export to export as a PDF file (only available under > Calendar)
-
Excel Export to export as an XLSX file
-
-
From the top dropdown list in the Settings area, choose:
-
Export all elements of view to include all activities, including currently hidden sub-activities
-
Export visible elements of view to include only activities that are currently visible (hidden sub-activities are excluded)
-
-
Optional: Activate the Highlight changes to timelines, tasks and markers checkbox to highlight the changes made within a certain period of time. If activated, you can:
-
Select the time span within which changes were made
-
Specify whether newly created and/or changed planning activities are highlighted
-
Activate the Highlight parent elements checkbox for better clarity
-
-
Optional: Activate the Include marker checkbox to include planning activity markers in the export
-
Select your delivery method:
-
Download export to save the export file directly
-
Send Export via E-Mail to send the export to specified recipients. Note: This option is required for parallel export
-
Use the Search for recipients field to select email recipients.
-
The overview table displays all the users that have been selected as recipients. You can delete users from the recipient list. The Access column shows whether the user is authorized to use the .
-
Enter a message if desired (emails can be sent without message body text)
-
-
-
Click to start the process.
The export is generated. Depending on your selection, you'll either be able to save/open the generated file immediately or the export will be processed in the background and sent to the recipients when complete.
Parallel Export for Large Tree Structures
The parallel export processing allows you to continue working while large tree structures are being processed in the background.
How Parallel Export Works
When exporting an entire tree structure (containing multiple subprojects or budgets):
-
Configure your export as usual (select the format, activities to include, etc.).
-
Choose Send Export via E-Mail in the export dialog (parallel export is only available when sending via email)
-
Enter the recipient information (you can include yourself).
-
Click and then close the panel by clicking ×.
-
Continue working in Marketing Planner while your export processes in the background.
When exporting is complete, an email containing the exported file is sent to the specified recipients.
Benefits for Beginners
-
No Waiting: You can continue your work without having to wait for large exports to finish
-
No Time-Outs: Larger exports are less likely to time out since they run in the background
-
Better Performance: The system remains responsive during export processing
-
Automatic Delivery: Your export is delivered directly when ready
Note
For smaller exports, you can still use the Download export option for immediate results. In terms of efficiency, parallel processing is most beneficial for large tree structures that would otherwise require a significant amount of time to process.